
How to sculpt a character in VR
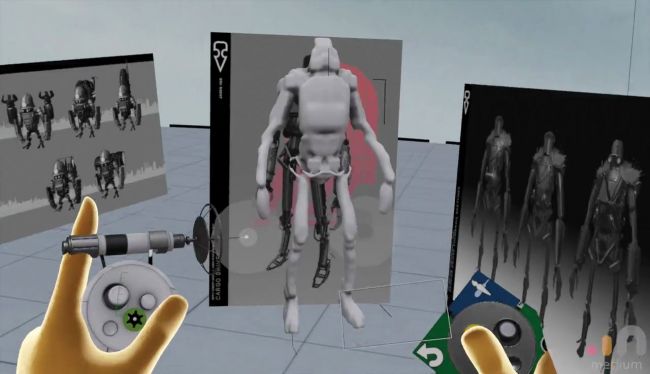
2. Import reference images
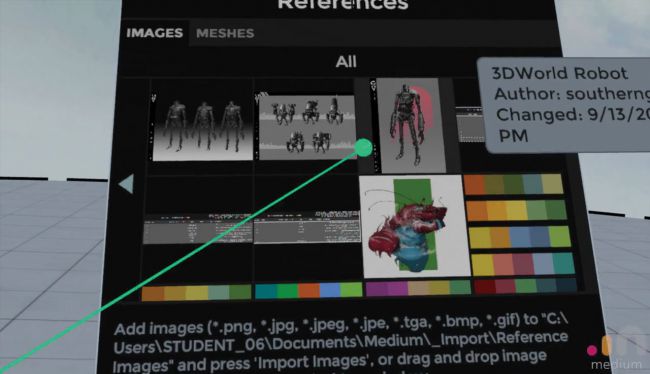
On your computer, look for the default Medium folder and look for a folder called _Import. In there you will find a folder for images and a folder for meshes. For this tutorial we bring in some robot character concept art to use as a guide in the scene. Pull back on the Support hand thumbstick and click the reference button at the bottom of the panel, which resembles a book. This will bring up the References panel. Click Import to add any images that have been saved to the _Import folder. They are now available to use as reference.
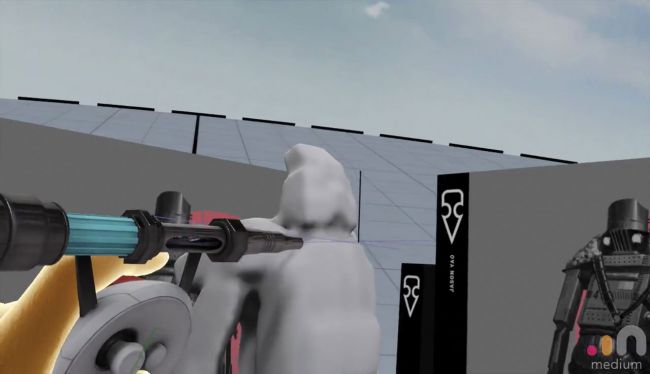
4. Block out the base of the robot
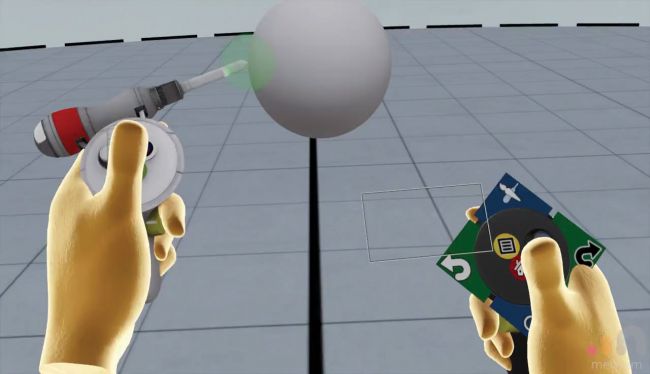
We will do a very rough layout model. Push forward on your Support hand thumbstick to bring up the tool radial menu and make sure you have the Clay tool selected. Pressing the trigger on the Tool hand adds clay to the scene. As the robot is symmetrical, we need to enable the mirror function by clicking the yellow control panel button on the Support hand and selecting Mirror.
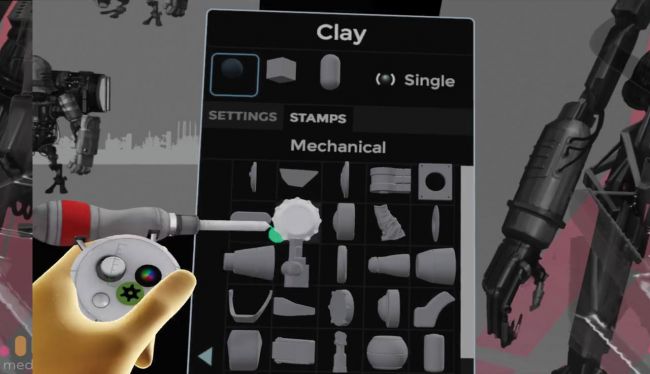
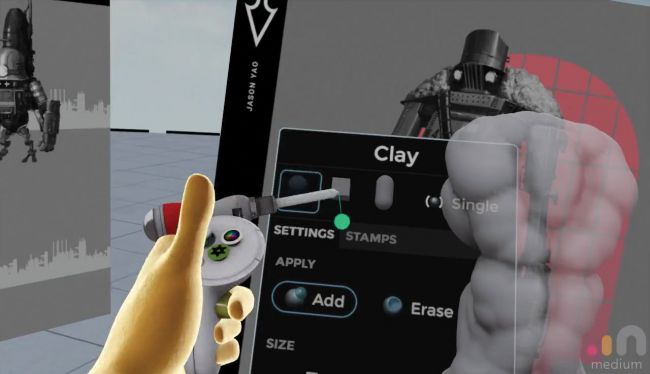
5. Change default stamps
We started sculpting with the Clay tool and with a default sphere shape. Although this is the most basic sculpting tool in Medium, it can be customised with a variety of different brush shapes. To change brush shape, press the green gear button on the Tool hand controller and at the top of the panel you will find the default brush shapes. Select one to make it the active shape at the end of your sculpting tool. Medium comes with a large catalogue of stamps, which are located in the menu below the default brush shapes.
6. Split the model into parts
Use the Cut tool and slice up the model, which automatically creates a new layer for each part. Push forward with the Support hand thumbstick and select the Cut tool on the radial menu. Remove the head first by moving the line through the neck while pressing the Tool hand trigger down. If you have done it correctly the head will be in a separate layer.
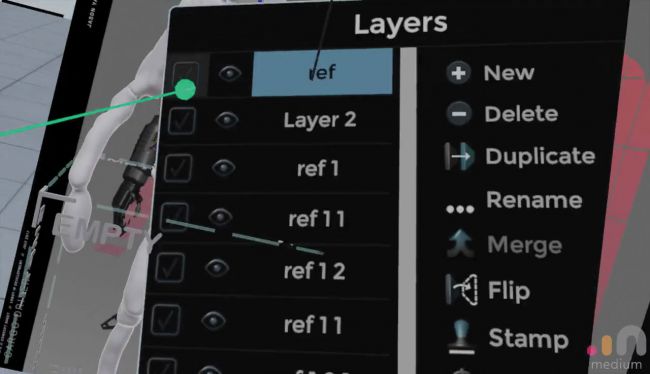
7. Navigate layers
Pull back the Support hand thumbstick and make sure you have the Layers panel selected, the first button on the row of icons at the bottom. From here you can rename, delete and merge your layers. For example you can use the eye icon next to the layer to hide individual layers as you work. If you point your Tool hand at a part and hit the trigger, you will automatically select the relevant layer, indicated by the yellow highlight. To cut a particular layer, re-select the main layer and continue cutting the model into individual parts.
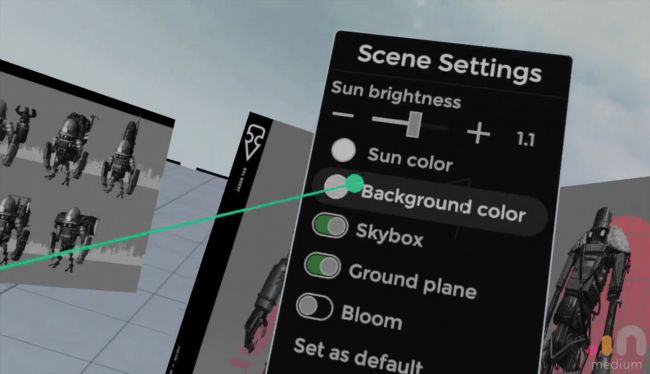
8. Adjust environment settings
So far we have been using the default environment settings. You may want to configure your environment to suit your own style. To do this, pull back on the Support hand thumbstick and click the button that resembles the world. From here you can change the sun colour, adjust the sun brightness, turn off the Skybox and change the background colour. You can also turn off the ground plane and just see the background colour you have chosen. Configure the world to suit your style and play around with the settings until you are happy.
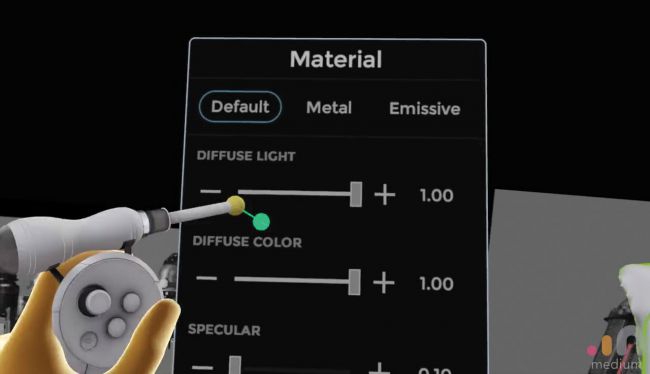
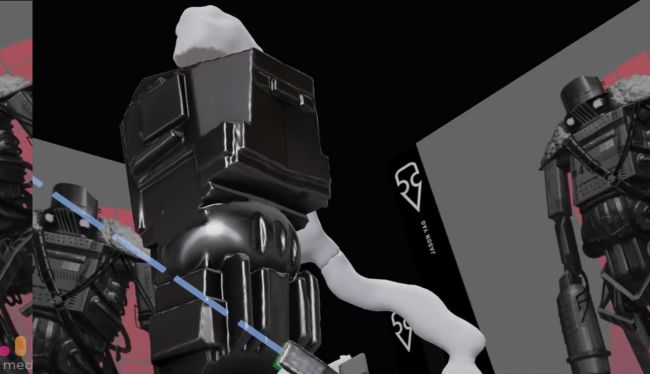
9. Adjust material settings
Seeing as though we are making a robot, let's change the material to a metal shader. You can set a material for each model per layer so you will have to choose each layer and adjust it to suit. To do this make sure you are on the Layer menu again, then select the part you wish to change the material of. With the layer selected, press the green settings button on your Tool hand. On this menu, change the material by clicking Metal at the top middle. Now you can change the roughness, diffuse settings and the occlusion of the material.
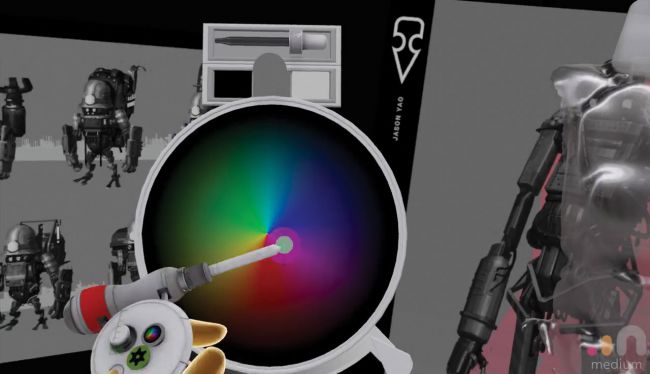
10. Pick a colour
As we are about to start working on each layer at a more accurate level, we might want to change the colour as we go along. Make sure you have the Clay tool activated and click the colour palette button on the Tool hand. Use the picker from the top to select an existing colour from your sculpt, or select black or white. Any clay you add from now will be the colour you have selected.
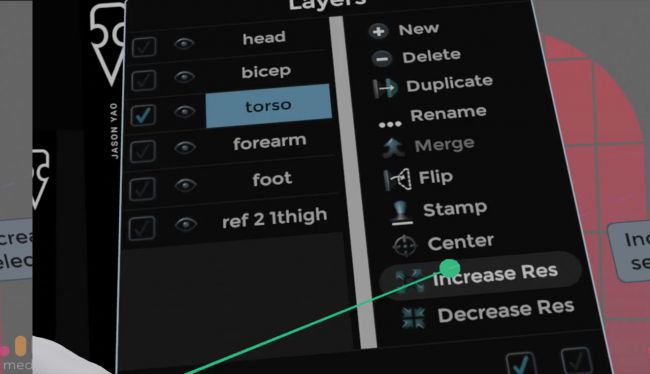
11. Increase layer resolution
For some areas of the model that carry a lot of detail, you may notice that when adding clay, the resulting brush stroke is blocky and jagged. To solve this, it is worth increasing the resolution of the layer. Go to the Layer menu. On the right-hand side, you can find the Increase Res option to increase the resolution of the selected layer. Every time this is done, the layer bounding box gets smaller, increasing the density of the voxel grid. Doing this in a physically large layer could result in it being cropped to fit inside the bounding box.
12. Apply clay in strokes
If you hold down the Tool hand trigger with the Clay tool selected and move your hand, this will create a continuous brush stroke. This can be changed by pressing the green gear icon on the Tool hand and selecting a single stamp at the top right of the panel. You can also enable line mode, which will lock the brush stroke along a line that protrudes from the Tool hand.
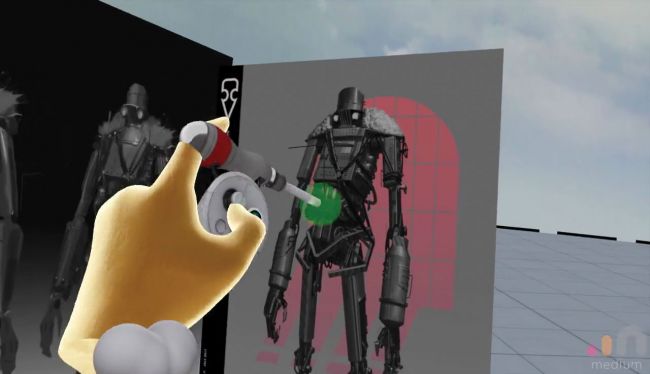
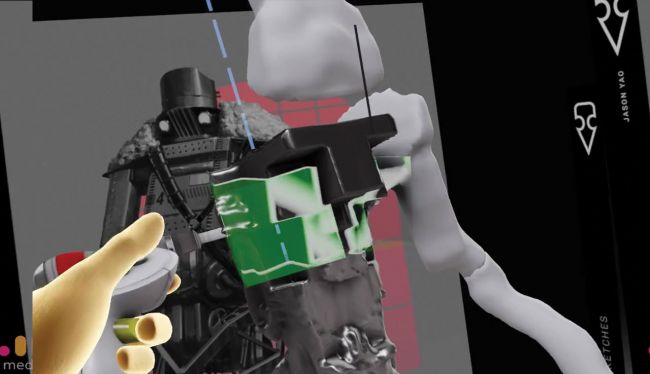
13. Define the shape of the torso
To begin creating the detailed parts of the robot we will make a start with the torso. Looking at the reference start building up the shape using the library of stamps at your disposal. Make sure mirror is activated as shown earlier. Use a combination of the sphere and cube brushes to create the form of the chest and abdomen. To subtract parts of the model double-click the green gear button and the colour of the shape at the end of the tool will turn red. This will now remove clay from the sculpt and can be used to create shaped recesses in the sculpt surface.
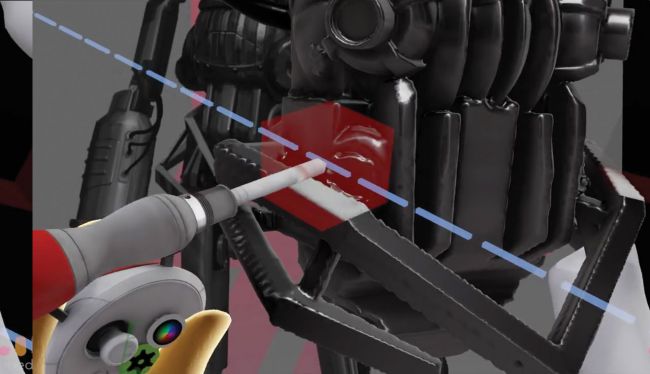
14. Use the line mode to add bars
At the bottom of the torso we want to add some protective bars. Use the cube stamp for a hard edge and go into tool settings and select the line mode. Lay down the bars and make sure they intersect where needed. Edges can be neatened by using the subtract clay mode in conjunction with the line tool to remove clay from the sculpt and to add a chamfer to the edges of that layer.
15. Utilise stamps
Press the green gear button to bring up the Tool Options menu. There are a large range of stamps available, arranged by category. For this project we will mainly be using the Mechanical stamps. When using a stamp, the shape added will reflect the resolution of the layer you stamp it on. Try a range of stamps in add and subtract modes to create interesting shapes.